Christmas cards for Moxie Fab World

Cath, over at Moxie Fab World is doing an amazing job of breaking down what several card "Styles" really mean....I'm learning a lot over there and finding it fascinating to pick apart my own styles and see what I like and why.


Here are the cards I've made for her challenges so far....but please - go over there and she what everyone else has linked up for the Shabby, Graphic/clean, Whimsical and Classic card styles.


The first challenge was a Clean & Graphic card, which I personally LOVE. I find these easier to crank out than some styles so maybe this is a little more ME?

Products: New SEI paper, my Stamp BOX Christmas tree stamps


The next challenge was a Shabby or Vintage card.....this is NOT my forte. I adore how they look and I have tons of product at home to make cards like this (how could I not with the amazing thrift store I have at my disposal)....I just don't do it on a regular basis. So, this was a little more out of my box, so to speak but very, very fun.

Product: New Basic Grey Eskimo Kisses, Rub-ons Marah Johnson, lace & beads from my local MCC


ETA: This card is going to be published in the Christmas issue of Scrapbook News & Review :)


The third challenge was what Cath called a Fun & Cute (or whimsical) style. These I love to do....I love cutsie image stamps - especially snowmen and I'm just beginning to learn how to colour with my Copics so I love to play with those a little too - on this card I only coloured the nose so no big experiment there, but I also paper pieced his scarf and earmuffs.

Products: New Basic Grey Eskimo Kisses, stamps from Purple Onion Designs


And the fourth challenge was a classic or elegant card. I love these too. They are so simple, and yet they have such a huge impact I find. My very favourite embellishment for classic cards like these is wide, wide ribbon. I have everyone I know on the look-out for deals on wide ribbon for me at the thrift stores and saving ribbons for me when they get gifts wrapped with it!

Products: New SEI Christmas Mint, charm from Boxer Designs


The Fifth, and I think, final Christmas card challenge is to make a stamped card. No problem here....I love to stamp and I love, love, love to cut out my stamped images and make them pop a little. I have to share this card today though - I gave a prize away on my blog awhile ago and the lady who won, surprised me back with a prize - a free copy of her first DIGITAL stamp set. I'd never used anything like that before so this was very fun to print out this digi stamp onto my patterned paper and use it just like I would as if I'd stamped it myself with ink. Letting my computer do the work for me :) Anyway...I love how it turned out - all winterey and cozy, but not necessarily Christmas per se. I had to re-draw on some of the steam lines and the string to attach the tea bag label. So fun!

Products: New Cosmo Cricket Jolly by Golly, digi stamp by: BeanPodFrogShop Etsy store


Thanks for checking out my blog!

If you're not a follower yet...please consider it. And please remember to stop back in for the my Stamp BOX blog hop on September 5th - I'll have prizes :)


Cathy

ABC Blog hop coming - Sept. 5th

Come check out some different and inspiring ways to use those Alphabet stamps that are collecting dust :) If you complete the blog hop and leave comments for everyone your name will go in a draw for a prize. And I think I may have a prize of my own up for grabs that day....come join me!

It was the best of times, it was the worst of times....

I haven't blogged in forever. I'm really sorry. I have lots of pictures taken that I intended to blog about and yet, here we are. So I'll do what I tell people when they're behind in their scrapbooking too....start current and then if you want to, work your way backwards and forward at the same time or you'll never "catch up."

So.
About my title today: "it was the best of times, it was the worst of times..."which some of you may recognize (or know that you've heard before) from Charles Dickens' A Tale of Two Cities....

Well, in the past 2 days I have been both at the top of my game, and flat on my face so it seemed kinda appropriate.

Top of my game: I went golfing on Tuesday night with some ladies I used to golf regularly with a couple of summers ago. Last summer I think I only went twice or three times and on Tuesday, I had to dig my clubs out of the shed -it's just been that kind of summer. Anyway, Bev called and said, "Hey, it's Texas Scramble - so even if you suck, it won't matter" or something like that....I think she said it nicer than that but I was pretty sure I would suck so I took it as a compliment and as a legitimate invitation. Texas Scramble, at our ladies night, only means that at some point in the game, you have to take a drive from each of the 4 participants on your team. No more - in case someone is stinkin' up the joint....but no less than one drive from each person. I figured even though I hadn't been out yet this year I could at least do one respectable drive. Then....lo and behold....I didn't stink as much as I thought I might and we even ended up taking my drive on the first hole :) In fact, half way through we were all playing pretty good, we'd all had good drives, so the pressure was off and we could just play whoever's shot was best. My "Top of my game" experience was getting a Birdie on Desert 8. It's a little Par 3 hole, over water, that generally claims a few of my 'water balls' on a regular day. But this time my drive (9-iron) landed about 4 feet from the pin and my putt went in :) That is a first for me. Then....if that wasn't surprising enough...on Desert 9 (here's a shot from the Quarry Oaks website)we took all my shots too - my Drive which I thought went in the trees to the right, actually sailed through, my second shot was a beauty lay-up to the end of the fairway (in the photo, in the second long shadow just to the left of the bend in the cart path), my 3rd shot went sailing (over water again) and landed about 6" from the hole (in the photo, you can see the blue flag but on Tuesday it was a little closer to lining up with the clubhouse). So these lovely ladies I was golfing with allowed me to putt it in for Par and be done. They were so excited for me - and I was very excited too although more surprised than anything. And ONCE AGAIN, this nasty game has sucked me back in. Golf is a love-it/hate-it sport. I can hate it for weeks on end, and then one great shot sucks me back in and I wonder why I haven't played all summer. D'oh.

Ok, then...
Flat on my Face: Quite literally. I went for a walk the next morning with my kids to the MCC store, to get some pictures developed at Shoppers Drug Mart and we had intended to go further to do more errands but coming out of Shoppers, I missed the sidewalk step to go down to the Main Street Sidewalk and BAM. Like a fallen tree. Someone should really have yelled "Timber!" because I'm sure it looked just like that. I twisted my ankle and got my knees nice and scraped. And apparently, hurt my wrist a little too catching myself but that only began to hurt last night. Mica immediately jumped into action asking me if I was OK, and offering to go back into Shoppers to get me Band-aids. She's such a nurturer. And the boys - they were finding it hard not to laugh I think. One of them said, "Mom, I've never seen you do that before." It was pretty funny I guess. My ankle was fine to walk home on and I've been icing it on and off.....it'll be fine. I was up at night at little with it, and my scraped knees because it hurt to roll over (that and too much coffee before bed). Anyway. I'm pretty sure this was not an incidence of "pride-before-the-fall" if that's where some of your minds were going.


I'm thinking actually, of combining this blog with my Art blog....any thoughts on that?

my Stamp BOX is having another DT Call!!

myStampBOX is searching for additional members for their design team!!


We are interested in designers with a variety of styles who can creatively showcase myStampBOX designs in their cards, altered art and scrapbook layouts. No previous design team experience is necessary.

Team requirements:
* 4 projects per month
* 1 blog entry per month including photos of a project and instructions/tutorial
* Upload all projects to the myStampBox website gallery and 2 other online galleries
* Submit at least 4 projects per term for submission to print magazines of your choice
* Occasionally help with additional design opportunities - new stamp sets, classes, newsletters, etc.

Team benefits:
*bio and picture on the website, with links to your blog
*a starter kit of stamp sets and additional stamp sets throughout your term
*other free scrapbooking supplies from product partners as they become available
*30% discount on purchased myStampBox stamps during your term

Term is 6 months, beginning October 1, 2009

my Stamp BOX website: www.mystampbox.com
Please send applications to: mystampbox@sympatico.ca
Include:
*personal information (your name, address & phone number)
*a short paragraph about yourself and why you think you’d be a good fit for myStampBox.
*link to your blog or gallery online
*5 examples of your work showcasing your stamping ability and style

Call ends Friday, September 11, 2009
International applicants are welcome to apply.


If you have any questions about this company/team/etc....feel free to contact me :)

Another Giveaway! my Stamp BOX

Aren't these 3 new sets from my Stamp BOX adorable? I've already cracked mine open to make a Christmas card (a few posts down, but I'll re-post it). Can't wait to crack the others open!! And you can win one of these sets!


You still have until August 30th to win one of the new stamp releases from my Stamp BOX.
Here's how:

1. Leave a comment on the New Stamp Releases blog post at my Stamp BOX, please include your first name and last initial and some way to get ahold of you if you win

2. leave a second comment on the New Stamp Releases blog post and tell us where you have posted about my Stamp BOX’s blog (on your own blog or in a forum)

This contest is open until August 30, the winner will be announced on August 31. Make sure to check the blog and to send in your address, if you win!

Winner, winner, chicken dinner :)

Sorry....I've always wanted to use that line :)

Random.org says the winner of my Clear Scraps prize is:


#12

3 weeks is a long to be away...but I bet you had fun!!!

Its hard to narrow it down...but the new Jillibean is amazing...as is CC :)

ReneeDezember.blogspot.com

Thanks for the chance to win :)

August 12, 2009 9:03 PM


I agree ReneeDezember! I adore Jillibean. Unfortunately their booth was packed when I had a few minutes at CHA. Unfortunate for me, not for them obviously. I'm contacting you for your addy for your Clear Scraps Prize! Thanks for playing everyone!!

It's never too late...or too early...for Christmas cards :)


A few posts down I mentioned that I scored some NEW Basic Grey, Cosmo Cricket & SEI....yahoo!!!!! And since we're currently having the coldest summer on record in nearly 20 years...it seemed like a good time to make some winter cards with this paper that I couldn't possibly let sit till December :)


Don't forget to leave me a comment today or tomorrow for my drawing for some FREE Clear Scraps goodies!! Let me know what some of your favourite new CHA goodies are this year :)

Hugs.
Cathy

How to cover chipboard letters in a Word Book

One of the most frequent questions I get when I tell someone about, or show them the "Clearly My Album" set-up at Clear Scraps (where you can order whichever letters you want, to spell out a word book of your choice), is HOW DO YOU COVER THE CHIPBOARD LETTER? Now, for some of us, this is second nature already but for some, it's a daunting task, especially since the back half of each letter isn't necessarily THERE, if you know what I mean. You're making the left-hand-side of the letter as you go.

So....I worked on one here at home this week and took pictures as I went to show you MY process, which may be different than your own, but it's definitely one that works.

IMG_3877
I'll start with an A. It's a great letter because it's symmetrical. First step....flip the letter over backwards and place it on your paper. The right-hand-side of the letter will be easy to X-acto knife around, it's the "hidden" left-hand-side that's difficult sometimes. So, flip the letter over and Cut around HALF of it....in this case, the outside edge, the outside "leg" and the inside hole in the A. It should then look like this...I forgot to pop the center out, but it is cut, trust me :)

IMG_3880


Now, flip your letter over the right way (it's not attached to your paper in any way yet). Use the 1/2 letter that you've already cut, as a guide - especially in this case, the hole in the center of your A. From here, you can now use your X-acto knife to cut along the right-hand-side of the letter as you normally would and when you're done, the A should fit perfectly on your chipboard page, defining the letter.

IMG_3886


OK, let's try something that's NOT symmetrical. How about an L.

The back half of the L is also not defined in a chipboard word book. But...you can predict what it will be like, by looking at the front of the L. Again, I started by laying my letter backwards on the paper I wanted to use. I'm assuming that the top of the letter will be symmetrical, so I cut the outside edge the same as the inside edge of the L. And, I cut about 3/4 of the way down the length of the L as well.
IMG_3887

Then, I flipped my L over. So now it's up-side-down and backwards. I'm working on the bottom outside edge of my L, but using the top, inside edge of my letter page. Make sense? When I'm done this cut, I'll have a straight line cut, with top and bottom "knobs" or whatever you want to call them, like my L is supposed to have on it's left-hand-side.
IMG_3888

My next step is to turn my letter the right way around (forward, and right-side-up). I'm eyeballing about how much width I want at the top of my L - see? And then I'm going to cut/trace down the right-hand-side of the L itself completing the letter.

IMG_3889 IMG_3890


One more show-and-tell....the letter Y. I have to do this one because it's a little tricky. Flip your chipboard book page over backwards so you use the right-hand-side of the Y to cut the left-hand-side first.

IMG_3891

Now, before you cut the opening out of the Y, slide your chipboard page over slightly so that the left-hand-side "leg" of your Y will be thicker than the right-hand-side. Trust me on this. This particular font that Clear Scraps uses for Clearly My Albums has a heavier leg on one side on a few letters....the skinny leg on both sides of your Y would NOT look right. Now cut the opening in the Y.

IMG_3892
And as a final step, flip your page back over the right way and finish cutting the right-hand-side of the Y.


So, there you have a few of my tips for covering chipboard (or acrylic) letters and getting exactly the letter you want. Here's my semi-finished project with all the page fronts done with Cosmo Cricket's The Boyfriend (ooooooh....aaaaaaah....) and the letters all done with a creamy ledger paper from the same pack.
IMG_3936

If you have any questions about what I've done, or need advice....email me - I love to chat. And don't forget my contest going on this week. Leave me a comment telling me some of your favourite new CHA releases (like The Boyfriend, hello people!!) and I'll pick someone who will win some Clear Scraps!

Thanks!
Cathy

Pencil holder

I bought these cutsie clay pencils on Etsy a while ago, here: Babs Place They were raw when I got them and I got to play with my old paint stash. Plus, thanks Cosmo Cricket for the paper!! I've almost used it all up!! I think my growing-up-too-fast Grade 6'er might Love this on her desk this fall....we'll see. I may have to keep it at home...something about a brand new stash of sharpened pencils gets me very excited, just like when I was back in grade school.


TFL.
Cathy

Talking the Talk

I have been talking up Clear Scraps for an entire week at CHA and I think I have my "speech" down now....it's like a loop playing over and over in my head....all the great things you can do with acrylic in general and then on top of that, all the uber-cool things you can do with Clear Scraps acrylic because of it's flexibility.

This is the project that I talked about most at CHA - I really have to make more like this!!These Christmas Candy boxes are 12"x12" sheets of Clear Scraps XL acrylic, cut down to 12"x6" with my grey Fiskars paper trimmer, run through my Cuttlebug with the D'vine Swirls embossing folder, scored into a square or triangular box with my Scor-pal and then glued together at the back with Helmar 450 adhesive. Unbelievable. No one is more suprised that all of that worked, than I am :) Please don't try all that crazy stuff with just any old acrylic....some will crack and fracture when you cut them, or dent your embossing folders, or not score at all, or crack when you fold them. Not Clear Scraps.

Oh, and the rest of the project....the lovely-can't-get-enough-of-it Alpine Frost from SEI!!

Don't forget to let me know what your favourite CHA releases are and I'll enter your name to win some Clear Scraps acrylic! Here, or in the previous blog post - either one -I'll check them both!

Back from CHA - and a giveaway!!

I think Dorothy had it right when she said, "There's no place like home." I'm so glad to be back - in my own bed, in my own home, in my own CLIMATE (for crying out loud - I am not built for Florida heat/humidity), and in my own scrapbook room! My family did 2 weeks at Disney and then I stayed longer for CHA and the Supershow and let me tell you - 3 weeks without scrapbooking is painful enough but also being surrounded for that last week by every new product on the market....downright torture. I have to admit - I unpacked every scrappy thing I brought home BEFORE I ever unpacked my laundry and toiletries. Who needs a hairbrush when you've got NEW Cosmo Cricket paper, that's what I'd like to know.

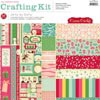
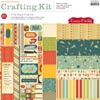
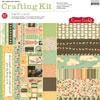
cc_jolly_by_golly_01 cc_boyfriend cc_earth_love


And I also picked up some of the new Basic Grey.....Phenomenal new patterns....I love what they're doing to change things up a little. I was, and I don't want to be too controversial here....but I was a little stunned that they chose "Indian Summer" and "Eskimo Kisses" as the names for 2 of their new lines. I am from Canada...and I've done the research that tells me in the US, Alaska in particular, Eskimo is still an accepted term but for the most past, it's not here in Canada....we've been taught since the 70's that Eskimo is considered a derogatory term and our northern Canadian people prefer the term Inuit, and yes, I know, we still have a professional football team called the Eskimos so we're not ALL that serious about our political-correctness. Also Indian has been completely eliminated from our texts and teaching because seriously people....they are not from India. Natives, Native Americans...etc....but not Indian. I'm not so offended that I'm writing to the company or anything...I'm just a little surprised, that's all.

Having said that - I will say again - easily their best paper To Date. Eskimo Kisses is darling - I've already made a few Christmas cards with it (see next few posts) and Nook & Pantry is awesome....I'm loving all the new Kitchen-y lines out there right now!
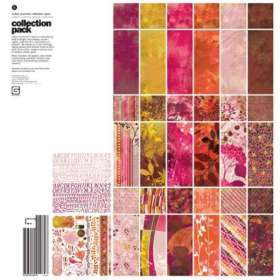
bg_indian_summer bg_eskimo_kisses bg_nook__pantry

That's all for now. Enough talking about it - time to play.....

I have a few brand new products that I brought home too....and I'm doing some experimenting at home on my Clear Scraps acrylic.....I'll let you know soon what, and how it worked.

In the mean time - how about a giveaway???


Tell me in a comment (don't forget to leave contact info, please), what your favourite CHA release was this year...and I'll draw a random name next Friday (Aug. 14) for a prize of Acrylic from Clear Scraps. My box at home is overflowing....I may even let you choose your prize :)